Git LFS allows users to save space by storing binary files in a different location, so in this tutorial I’m going to show you how can you operate and manage your repo using Git LFS.
Prerequisites
- Git
- Bitbucket account and repository
- sudo privileges
Installing Git LFS
In this tutorial, we will use CentOS 7 as a host machine to install and work with Git LFS. Before installing Git LFS, we need to make sure that git is already installed on your machine. To check this, run:
sudo git --version
You should see the output like below:
Output: git version 1.8.3.1
Next, install the epel repo by running the following command:
sudo yum install epel-release
To install the Git LFS repo, run:
curl -s https://packagecloud.io/install/repositories/github/git-lfs/script.rpm.sh | sudo bash
And finally:
sudo yum install git-lfs
That’s it, we successfully installed Git LFS.
Clone Bitbucket repo with Git LFS
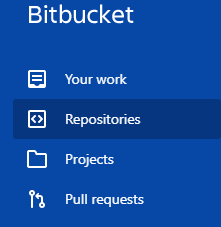
Step 1. Log in to your Bitbucket account, navigate to Repositories and open it.

Next, we will clone that repo to our CentOS 7 machine.
Step 2. Create a directory project and navigate to that directory using the following commands:
sudo mkdir ~/project
sudo cd ~/project/
Now you should clone your repository to the local machine.
sudo git clone [email protected]:repo-name/project.git
If you receive the following error:
Permission denied (publickey).
fatal: Could not read from remote repository.
You need to set up SSH keys and configure it with Bitbucket.
Step 2. From your project directory initialize git lfs.
sudo git lfs install
Fetch the LFS objects for the current ref from default remote.
sudo git lfs fetch
And now download Git LFS objects for the currently checked out ref.
sudo git lfs pull
Conclusion
In this tutorial, we’ve shown you how to use git lfs with Bitbucket repository. To find more neat Git commands and hacks, browse the Git category. Feel free to leave a comment below and if you find this tutorial useful, follow our official channel on Telegram.